Easy, exciting nail art is at your fingertips
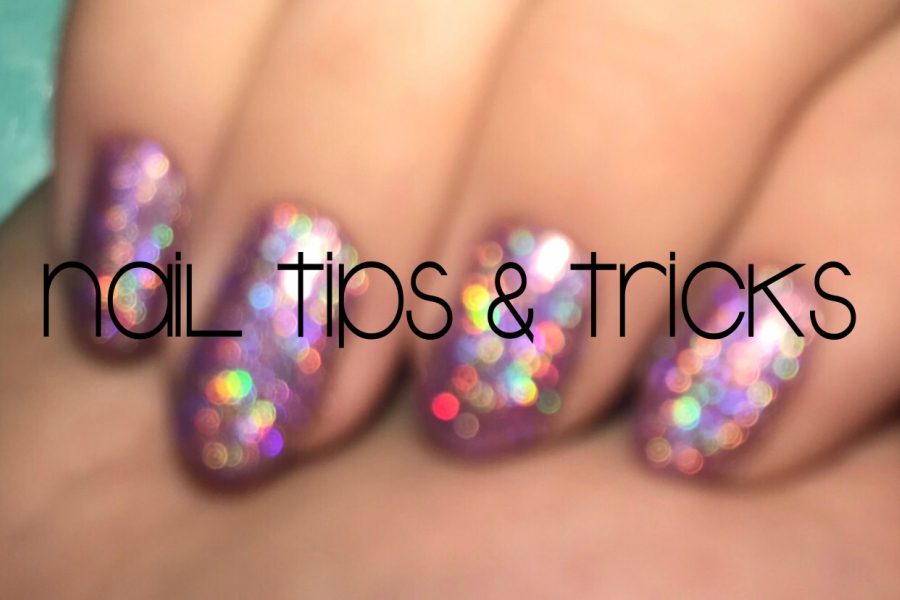
IMAGE / Megan Millinkov
Tips and tricks for easy nail art.
Many people deter from painting their own nails with the excuse that it is difficult or time consuming.
I used to believe the same thing, but over the years I have gathered several tips and tricks for doing nail art that make the process easy and fun.
Now, I put in effort at least once a week to achieve fun, easy, and interesting nails.
Senior Barbara Hawes is a fan of my nail art.
“Megan’s nail art is really cool. It’s intricate and it makes it really stand out,” Hawes said. “I would never have the patience for it, but I would definitely take tips from her.”
Below is a list of several tricks that can help bring your manicure up a notch, or aid in easier cleanup.
Cuticle barrier
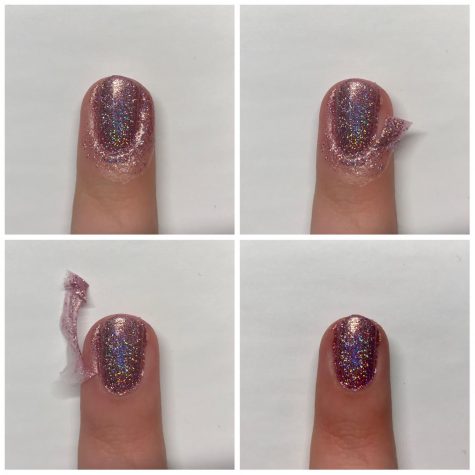
Nails painted by senior Megan Millinkov using cuticle barrier.
An issue that is a common occurrence while painting is trying to use a small brush to paint clean lines without “overflowing” or accidentally getting the polish on skin surrounding the nails and cuticles.
Instead of using acetone or nail polish remover that can dry out or damage skin, there are numerous products that companies have made to help with this issue, including, but not limited to, liquid latex, glue, and tape.
Covering the skin surrounding the nail with the barrier ensures no nail polish touches the skin.
Remove barrier after doing nail art using careful fingers or tweezers.
The result will be clean skin and cuticles surrounding your manicure.
Cosmetic Sponge
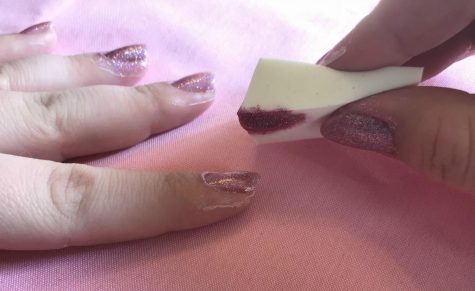
Nails painted by senior Megan Millinkov using cosmetic sponge glitter application.
Helpful in a number of ways, wedge-shaped cosmetic sponges are a cheap, useful tool.
Applying a glitter nail polish onto the sponge allows it to soak in most of the clear liquid part of the polish, leaving only glitter pieces on the sponge.
The glitter can be applied from the sponge onto the nail by lightly pressing it onto the nail.
Using this trick, it allows a large quantity of glitter to be applied onto the nail without needing to paint on several coats of polish.
Another use the sponge provides is an easy way to make a gradient of colors on the nail.
Two to three polishes can be applied onto the sponge in stripes in the order the gradient is desired.
With light pressure, the polish can be pressed onto the nail. Multiple coats of polish may be required to reach the desired look.
The dried polish on the sponge can be cut off easily with scissors, making the sponge reusable.
Acrylic paint
Nails painted by senior Megan Millinkov using acrylic paint and cosmetic sponge glitter application.
You don’t have to be a professional nail technician or an artist to be able to paint nice looking nail art.
Using traditional acrylic paints over nail lacquers is a trick used by many online and professional nail artists. It allows for tiny detailing to be done.
Before any paint is applied, use a quick-dry top coat over the nails.
Use small paint brushes that are used for detailing. They allow paint to be applied onto nails easily.
In addition, acrylic paint dries faster and is easier to paint with than regular nail polishes.
If a mistake is made, wait until the paint has dried. The dried paint can be scraped off with a small tool, such as a toothpick.
Peel-off base coat
Peel-off base coats can be applied to clean nails before any polish application.
These base coats make removal of polish easy, especially for nail polishes that contain glitter or require several layers.
The base coat typically allows wearers three days before the manicure is ready to be removed.
Permanent marker
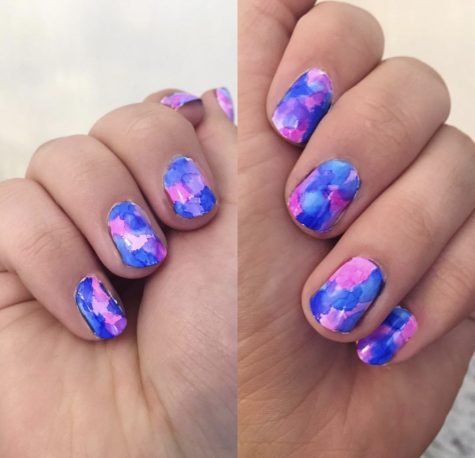
Nails painted by senior Megan Millinkov using permanent marker and rubbing alcohol mix.
Using permanent marker to make paint gives off a watercolor effect on nails.
Draw on a plastic surface (like a lid from a plastic sour cream container) with permanent markers and mix the ink with rubbing alcohol using a paintbrush.
Beforehand, paint nails white or a light color. Allow them to dry before painting over them.
Using a small paintbrush, apply the ink and alcohol mixture onto the nails.
The alcohol dries quickly and can be layered until the desired look is achieved.

Birthday: May 16, 2000
Extracurricular activities: Studio art
Hobbies: Reading, video games, and art.
Plans after high school: Go to college...